Friday, December 13, 2024

Transform Your Kitchen: 10 Easy Steps to an Organized Space

 Transform Your Kitchen: 10 Easy Steps to an Organized Space

A well-organized kitchen isn’t just visually pleasing—it makes cooking, cleaning, and entertaining a breeze! Whether your kitchen is large or small, clutter and disorganization can quickly make it feel chaotic. But don’t worry! With a few simple tips and tricks, you can transform your kitchen into an efficient and inviting space. Ready to get started? Here’s a step-by-step guide to organizing your kitchen like a pro.


1. Start with a Declutter
Before organizing, take a good look at what you have. Remove items you no longer use, expired pantry goods, and anything broken or beyond repair. Donate duplicates or items you haven’t used in the past year. A clean slate makes organizing much easier!

Before organizing, take a good look at what you have. Remove items you no longer use, expired pantry goods, and anything broken or beyond repair. Donate duplicates or items you haven’t used in the past year. A clean slate makes organizing much easier!


2. Group Similar Items Together
Organize your kitchen essentials into categories like baking supplies, canned goods, spices, or utensils. Grouping items by their purpose makes them easier to find and keeps your kitchen functional.

Organize your kitchen essentials into categories like baking supplies, canned goods, spices, or utensils. Grouping items by their purpose makes them easier to find and keeps your kitchen functional.


3. Maximize Cabinet Space with Organizers
Use shelf risers, pull-out drawers, or stackable bins to maximize vertical space inside cabinets. Lazy Susans are a great addition for hard-to-reach corners, especially for spices or condiments.

Use shelf risers, pull-out drawers, or stackable bins to maximize vertical space inside cabinets. Lazy Susans are a great addition for hard-to-reach corners, especially for spices or condiments.


4. Create Zones for Efficiency
Divide your kitchen into zones based on activities. For example, designate a cooking zone near the stove, a prep zone with cutting boards and knives, and a coffee or tea station. This will streamline your workflow and make tasks easier.

Divide your kitchen into zones based on activities. For example, designate a cooking zone near the stove, a prep zone with cutting boards and knives, and a coffee or tea station. This will streamline your workflow and make tasks easier.


5. Optimize Drawer Organization
Invest in drawer dividers to keep utensils, gadgets, and small items neat and easy to find. Assign each drawer a specific purpose, like one for cutlery, one for tools, and another for food storage containers.

Invest in drawer dividers to keep utensils, gadgets, and small items neat and easy to find. Assign each drawer a specific purpose, like one for cutlery, one for tools, and another for food storage containers.


6. Utilize Wall Space
Free up counter and drawer space by adding wall-mounted hooks, magnetic knife strips, or pegboards. Hang frequently used items like pots, pans, or cooking utensils for easy access.

Free up counter and drawer space by adding wall-mounted hooks, magnetic knife strips, or pegboards. Hang frequently used items like pots, pans, or cooking utensils for easy access.


7. Label Everything
Labels are a game-changer when it comes to organization. Use them on pantry bins, spice jars, and storage containers to keep everything in its place. Clear containers also make it easy to see what you’re running low on.

Labels are a game-changer when it comes to organization. Use them on pantry bins, spice jars, and storage containers to keep everything in its place. Clear containers also make it easy to see what you’re running low on.


8. Keep Counters Clear
Limit what you keep on your countertops to essentials like a coffee maker or fruit bowl. Clear counters create a more spacious and serene environment, making your kitchen feel less cluttered.

Limit what you keep on your countertops to essentials like a coffee maker or fruit bowl. Clear counters create a more spacious and serene environment, making your kitchen feel less cluttered.


9. Tame the Tupperware Chaos
Match lids to containers and store them together. Consider using a drawer or bin dedicated solely to food storage containers. Stack them by size to save space and keep things neat.

Match lids to containers and store them together. Consider using a drawer or bin dedicated solely to food storage containers. Stack them by size to save space and keep things neat.


10. Maintain the System
An organized kitchen isn’t a one-time effort. Commit to regular maintenance by tidying up each week, reviewing pantry items, and re-evaluating what you really need. Consistency is key to keeping your kitchen organized in the long term.

An organized kitchen isn’t a one-time effort. Commit to regular maintenance by tidying up each week, reviewing pantry items, and re-evaluating what you really need. Consistency is key to keeping your kitchen organized in the long term.


A well-organized kitchen doesn’t just look great—it saves time, reduces stress, and enhances your cooking experience. With these tips, you’ll create a space that’s both functional and inviting. Which step will you tackle first? Let us know in the comments below!

Thursday, December 12, 2024

Creative Ways to Incorporate Pink into Your Home Office

 Creative Ways to Incorporate Pink into Your Home Office

Adding pink to your home office is a fantastic way to infuse warmth, personality, and a touch of sophistication into your workspace. Whether you prefer subtle blush tones or bold magenta, here are creative ways to make pink work in your home office:

1. Blush Pink Walls
A serene home office with blush pink walls, white floating shelves, and gold accents.

Painting your walls in a soft blush pink creates a calming and inviting atmosphere that inspires productivity.

Picture this: A serene home office with blush pink walls, white floating shelves, and gold accents.

How to recreate:

  • Choose a muted blush pink paint color.

  • Pair with white or neutral furniture.

  • Add gold hardware or decor for a chic look.

2. Rose Gold Accessories
A minimalist desk setup with rose gold organizers, a pink notepad, and a matching desk lamp.

Incorporate rose gold accents such as desk organizers, lamps, or frames for a subtle pink shimmer.

Picture this: A minimalist desk setup with rose gold organizers, a pink notepad, and a matching desk lamp.

How to recreate:

  • Look for rose gold desk accessories online or in stores.

  • Pair with neutral-colored furniture for balance.

  • Use matching pink stationery for a cohesive theme.

3. Pink Velvet Chair
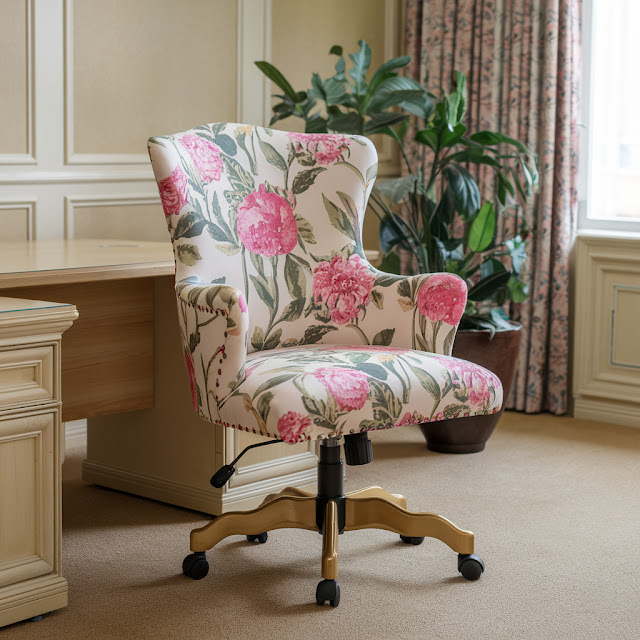
A cozy pink velvet chair next to a sleek white desk with a faux fur rug underneath.

Swap your regular office chair for a plush pink velvet chair to add comfort and style.

Picture this: A cozy pink velvet chair next to a sleek white desk with a faux fur rug underneath.

How to recreate:

  • Choose a pink chair that fits your office aesthetic.

  • Place a white or gray rug beneath your desk.

  • Add a throw pillow for extra comfort.

4. Pink and Gold Gallery Wall
A wall adorned with pink and gold framed art, inspirational quotes, and floral prints.

Create a gallery wall featuring pink and gold artwork or motivational prints to personalize your space.

Picture this: A wall adorned with pink and gold framed art, inspirational quotes, and floral prints.

How to recreate:

  • Select prints that feature pink and gold tones.

  • Use gold or white frames to display the art.

  • Arrange the frames symmetrically for a polished look.

5. Pink Desk Lamp
A sleek pink desk lamp providing light on a white desk with minimal clutter.

Brighten up your workspace with a statement pink desk lamp that doubles as decor.

Picture this: A sleek pink desk lamp providing light on a white desk with minimal clutter.

How to recreate:

  • Find a pink lamp that suits your style (modern, vintage, etc.).

  • Keep your desk decor simple to let the lamp stand out.

  • Use warm light bulbs for a cozy glow.

6. Pink Area Rug
A patterned pink rug under a glass desk with white and pink office supplies neatly arranged.

Anchor your home office with a pink area rug to add texture and warmth to the room.

Picture this: A patterned pink rug under a glass desk with white and pink office supplies neatly arranged.

How to recreate:

  • Choose a pink rug with subtle patterns or textures.

  • Match with neutral furniture to avoid overwhelming the space.

  • Add a desk mat to protect the rug from chair wheels.

7. Accent Wall with Pink Wallpaper
A home office with floral pink wallpaper behind a wooden desk and pink accessories.

Use pink wallpaper with a unique pattern to create a stunning focal point in your home office.

Picture this: A home office with floral pink wallpaper behind a wooden desk and pink accessories.

How to recreate:

  • Pick a peel-and-stick wallpaper for easy installation.

  • Use a statement wall behind your desk.

  • Coordinate with other pink accents in the room.

8. Pink Curtains
Light pink sheer curtains framing a sunny window with a small potted plant on the sill.

Soft pink curtains can frame your windows beautifully while adding a touch of elegance.

Picture this: Light pink sheer curtains framing a sunny window with a small potted plant on the sill.

How to recreate:

  • Select curtains in a pink hue that complements your wall color.

  • Use sheer materials for a light and airy feel.

  • Add tiebacks for a polished finish.

9. Pink Desk Accessories
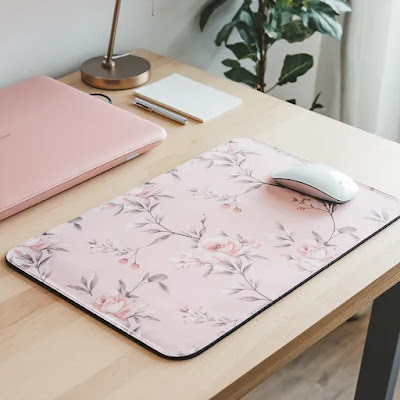
A desk filled with pink pens, a matching mouse pad, and a pink planner.

Swap out your standard office supplies for pink versions to tie the theme together.

Picture this: A desk filled with pink pens, a matching mouse pad, and a pink planner.

How to recreate:

  • Purchase pink stationery and organizers.

  • Pair with a neutral desk to let the pink pop.

  • Keep accessories functional but stylish.

10. Pink Plant Pots
Small green plants in pastel pink pots placed on a white desk and bookshelves.

Use pink planters for your desk or shelves to bring a touch of nature and color into your office.

Picture this: Small green plants in pastel pink pots placed on a white desk and bookshelves.

How to recreate:

  • Find pink ceramic or plastic pots in various sizes.

  • Choose low-maintenance plants like succulents or snake plants.

  • Arrange the pots around your workspace for balance.

Each of these ideas demonstrates how pink can transform your home office into a stylish and functional space. Whether you opt for bold statements or subtle accents, incorporating pink can make your workspace uniquely yours.

10 Green Kitchen Designs to Inspire You

10 Green Kitchen Designs to Inspire You

Green kitchens are having a major moment! Whether you’re drawn to moody forest hues, soft sage tones, or vibrant emeralds, a green kitchen can bring warmth, character, and timeless elegance to your home. Here are 10 breathtaking green kitchen designs to spark your creativity:


1. Sage Green Serenity

Soft sage cabinets paired with white marble countertops and a farmhouse sink create a soothing and inviting space. Add brass hardware and open shelving for a touch of modern rustic charm.

Picture this: A bright kitchen with large windows letting in natural light, sage green cabinets, and brass sconces over open wood shelves.

How to recreate:

  • Paint cabinets in a soft sage green shade.

  • Use white marble or quartz countertops.

  • Install brass hardware and open wood shelves.

  • Add a farmhouse sink for a rustic touch.


2. Forest Green Luxe

Dark forest green cabinets with gold handles and a matching green backsplash make a bold statement. Pair this with warm wood floors and pendant lighting for a luxurious and cozy feel.

Picture this: Rich forest green cabinetry under warm lighting with gold accents and a matching backsplash tying it all together.

How to recreate:

  • Choose a deep forest green paint or stain for cabinets.

  • Install a green tile or stone backsplash.

  • Use gold hardware and pendant lighting.

  • Add warm wood flooring for a cozy finish.


3. Minty Fresh Minimalism

Light mint green cabinets provide a fresh and airy vibe, perfect for smaller kitchens. Keep it minimalist with white quartz countertops, sleek chrome hardware, and an abundance of natural light.

Picture this: A compact yet bright kitchen with mint green cabinets, white counters, and a sleek, modern look.

How to recreate:

  • Paint cabinets in a mint green shade.

  • Use white quartz countertops for a clean look.

  • Opt for chrome hardware and minimal decor.

  • Maximize natural light with large windows or light curtains.


4. Emerald Elegance

Emerald green cabinets combined with a dramatic black marble island and brass accents exude sophistication. Add an oversized chandelier for an extra dash of glam.

Picture this: A bold and glamorous kitchen with emerald cabinetry, brass details, and a stunning chandelier above the island.

How to recreate:

  • Use emerald green paint for cabinets.

  • Install a black marble countertop or island.

  • Add brass hardware and an oversized chandelier.

  • Incorporate dramatic lighting to enhance the mood.


5. Olive Green Farmhouse

Olive green shaker cabinets with a butcher block countertop create a warm, earthy aesthetic. Add a classic subway tile backsplash and rustic wooden beams for a farmhouse-inspired look.

Picture this: A cozy kitchen with olive green cabinetry, rustic wooden beams, and warm, earthy tones.

How to recreate:

  • Paint cabinets olive green.

  • Use butcher block countertops for warmth.

  • Install white subway tiles for the backsplash.

  • Add rustic wood elements like beams or open shelving.


6. Two-Tone Charm

Combine soft green lower cabinets with white upper cabinets for a balanced and modern approach. This look is perfect for brightening up your space while adding a pop of color.

Picture this: A bright and cheerful kitchen with two-tone cabinetry and simple, modern decor.

How to recreate:

  • Paint lower cabinets in a soft green and upper cabinets in white.

  • Use light countertops to tie the look together.

  • Add simple hardware for a clean finish.


7. Green and Brass Glam

Deep green cabinetry with polished brass handles and a matching brass faucet create a luxurious yet inviting atmosphere. A white marble backsplash ties the look together beautifully.

Picture this: A sophisticated kitchen with bold green cabinets, brass accents, and a marble backsplash.

How to recreate:

  • Use deep green paint for cabinets.

  • Install brass hardware and fixtures.

  • Use white marble for the backsplash.

  • Add warm lighting for a cohesive look.


8. Vintage Vibes

Dark green cabinets paired with open wood shelves and antique accents bring a vintage vibe to life. Complete the look with a retro-style fridge and patterned floor tiles.

Picture this: A charming kitchen with dark green cabinetry, antique details, and a retro-style fridge.

How to recreate:

  • Paint cabinets a dark green shade.

  • Use open wood shelving and antique hardware.

  • Add a retro fridge and patterned tiles for a vintage feel.


9. Tropical Chic

A tropical green backsplash with palm-inspired tiles or vibrant green paint gives your kitchen a fresh, breezy look. Pair with natural wood cabinetry and rattan bar stools for a vacation-inspired feel.

Picture this: A breezy, tropical-inspired kitchen with bold green tiles and natural wood accents.

How to recreate:

  • Install tropical or palm-patterned green tiles for the backsplash.

  • Use natural wood for cabinets or accents.

  • Add rattan or wicker bar stools for a tropical vibe.


10. Classic Green and White

Nothing beats the timeless appeal of green and white. Opt for a rich green island paired with white cabinetry and countertops. Add black accents for a crisp, modern twist.

Picture this: A classic kitchen with a rich green island, crisp white cabinetry, and modern black accents.

How to recreate:

  • Paint the island in a rich green shade.

  • Use white cabinets and countertops for contrast.

  • Add black hardware and accents.

  • Incorporate modern lighting for a polished look.


Each of these designs highlights the versatility and beauty of green in the kitchen. Whether you’re planning a full renovation or just adding a splash of green through paint or decor, these ideas can help you create the perfect space to cook, gather, and enjoy.


5 Dreamy Blues to Transform Your Bedroom

 5 dreamy blues to transform your bedroom

There’s just something about blue that makes it the perfect colour for a bedroom. It’s calming, versatile, and oh-so-stylish! Whether you’re dreaming of a peaceful retreat or a bold statement space, I’ve rounded up five dreamy shades of blue that will completely transform your bedroom. Let’s dive in—and don’t forget to picture how cozy your space could feel with these gorgeous hues!

1. Soft Powder Blue

This shade is like a gentle hug every morning! Powder blue brings an airy, peaceful vibe to your bedroom, making it ideal for creating a retreat you’ll never want to leave. Think walls painted in this dreamy hue, paired with crisp white bedding and natural wood furniture for that fresh, Scandinavian-inspired look. Add a cozy knit throw and gauzy linen curtains for texture—and maybe a sweet little plant in a ceramic pot to tie it all together.

Picture this: A bright, serene space where the sunlight filters through soft curtains, highlighting your clean, minimalist decor. Pure bliss!

How to recreate:

  1. Start by choosing a high-quality powder blue paint for your walls.

  2. Invest in white cotton or linen bedding and look for light wood furniture to complement the airy vibe.

  3. Finish with soft textiles like a chunky throw and linen curtains.

  4. Bring in greenery for an added touch of life.

2. Deep Navy Blue
A moody yet sophisticated bedroom with soft lighting that highlights the richness of navy. Imagine curling up here after a long day!

Want to make a bold statement? Navy blue is your go-to. It’s rich, moody, and oh-so-glamorous. Use it as an accent wall or go full-on navy for a cocooning effect. Pair it with gold or brass accents, like a sleek lamp or a stunning mirror, to add a touch of luxe. Velvet bedding in creamy neutrals or soft greys will keep things plush and cozy, while a statement chandelier ties everything together.

Picture this: A moody yet sophisticated bedroom with soft lighting that highlights the richness of navy. Imagine curling up here after a long day!

How to recreate:

  1. Paint a feature wall (or the entire room!) in navy blue.

  2. Incorporate gold or brass accents through lighting or decorative pieces.

  3. Opt for velvet bedding in soft tones.

  4. Consider a glamorous light fixture for added drama.

3. Muted Slate BlueA perfectly balanced room that feels contemporary but oh-so-cozy. Bonus points if there’s a cup of tea on your bedside table!


Slate blue is like the cool, laid-back cousin of navy. It’s subtle, chic, and incredibly versatile. This grey-toned blue works wonders for creating a modern, serene space. Use it for an accent wall or go all-in for a monochromatic vibe. Pair it with clean-lined furniture, black or chrome accents, and soft layers like wool throws and faux fur pillows to keep things inviting.

Picture this: A perfectly balanced room that feels contemporary but oh-so-cozy. Bonus points if there’s a cup of tea on your bedside table!

How to recreate:

  1. Choose a muted slate blue paint.

  2. Pair it with modern furniture in clean, neutral shades.

  3. Add accents like a faux fur throw or black picture frames to maintain a contemporary feel.

  4. Layer textures to create warmth and depth.

4. Vibrant Turquoise

If you’re all about energy and personality, turquoise is calling your name. This vibrant shade can liven up your bedroom in the best way possible. Use it sparingly on an accent wall or bring it in through fun decor pieces like throw pillows, rugs, or even a painted dresser. Pair it with crisp white for a fresh feel, or mix in warm tones like terracotta and mustard for a boho-Mediterranean vibe.

Picture this: A playful and lively bedroom with turquoise accents popping against neutral tones. Think woven baskets, patterned throws, and maybe a tropical plant or two!

How to recreate:

  1. Incorporate turquoise through an accent wall or bold decor pieces like cushions or artwork.

  2. Pair it with white furniture or linens.

  3. Add warm terracotta pots or woven baskets for a Mediterranean touch.

  4. Include a few tropical plants to complete the lively vibe.

5. Classic Royal BlueA regal yet inviting bedroom that feels both polished and cozy. Perfect for channeling your inner royalty every day!

There’s a reason royal blue is…well, royal! This timeless shade adds a sense of richness and tradition while still feeling modern. Use it on your walls, in your bedding, or through a statement piece like a bold headboard. Pair it with creamy neutrals to keep things balanced, and add a classic touch with elegant drapery or a Persian rug.

Picture this: A regal yet inviting bedroom that feels both polished and cozy. Perfect for channeling your inner royalty every day!

How to recreate:

  1. Use royal blue on one wall or in statement furniture pieces like an upholstered bed.

  2. Complement with neutral bedding.

  3. Incorporate traditional touches like a vintage rug or elegant curtains.

  4. Add subtle metallic accents for an elevated look.

Final Thoughts: Making Blue Work for You

  • Layer It Up: Mix and match textures like velvet, linen, and chunky knits to add depth and dimension.

  • Play with Lighting: The right lighting can make or break your design. Natural light brings out blue’s softness, while warm lights add coziness.

  • Balance is Key: Blue loves to shine alongside neutrals, metallics, or even a pop of complementary colour like coral or mustard.

With these stunning shades of blue, your bedroom can become the sanctuary you’ve been dreaming of. Which one speaks to your style? Let me know—I’d love to hear all about your plans!


Tuesday, November 19, 2024

Oh Christmas Tree, Oh Christmas Tree!

I found this gorgeous 6ft flocked Christmas tree while browsing on Amazon and fell in love. It was the perfect addition to my bedroom. One of my favorite seasons to decorate for is Christmas. I would have a tree in every room if I could. I have a larger tree and wanted to set it up where by bunny girl Annie has her little hay room. She brought up a stink so I opted this year for the Amazon tree as my main tree. Its skinny and tall and perfect. Also very lightweight and the best part easy to put together. You can store it later in the box which isn't very big at all. I love this tree. Its currently on sale too with a discount code. All you need to do is quickly stack the pieces, fluff the branches, decorate. I added a strand of batter lights which I also purchased on Amazon. I may be addicted to Amazon lol

To decorate I used an assortment of ornaments, floral picks, bows and some plastic snowflakes. I think it turned out quite cute the white tree collar is also an amazon find. The tree and collar are linked below. I love this collar it comes in a small box and it clicks together in pieces. In Love!!

6ft tall flocked artificial Christmas tree with 477 snow branches.
Auto open with a steel base!

26.8' round wicker pattern. Made with high durable plastic just
click together and its done tree collar.


There it is my pretty tree this year.
Here are some additional up close photos of the tree.

Pretty, Pretty, Pretty!!


Amazon affiliated links below to shop:

Christmas Tree: https://amzn.to/4hS5DMT
Tree Skirt: https://amzn.to/3ZaCZ2e
Fairy Lights: https://amzn.to/4hX4e7W
USB Adapter: https://amzn.to/3V2y5Sn

If you have any questions leave a comment below. Happy decorating!

Wednesday, November 13, 2024

Make Glass Stud Earrings With Me

A step by step guide on how I make my glass cabachon earrings.


STEP ONE:

I created a template of my favorite prints in Photoshop. Each image is 12mm in diameter. I then print them out using my home printer. I use high quality 4x6 glossy photo paper. I love the clean crisp images that I get with my printer and this paper.

STEP TWO:

Now we make the cabochons. I purchase 12mm glass domes on Etsy. I then use my clear glue and put a drop onto each image. I then take the glass dome and apply it on top with some pressure and to wiggle it around to get out any air bubbles. This makes for a clear crisp cabochon for my earrings.

STEP THREE:

Now it's time to cut the images out. After the cabcohons have dried 24 hours. I then cut out the section of the cabochons I am making. Take your scissors and cut around the domes to make the pieces for your earrings. You'll be cutting through some of the glue.

STEP FOUR:

Time to grab an emery board. I get mine at my local dollar store. Take your emery board and file lightly around each piece to remove the excess glue and get a clean edge around your domes. Careful not to scratch the surface and ruin your cabochons.

STEP FIVE:

Time to make your earrings. Using some E6000 glue I put a small dab onto the backs of the cabochons and then I put them into my 12mm stainless steel bezels. Let dry for 24 hours and now you have some pretty silver glass stud earrings.

PROJECT COMPLETED

Yay our earrings are ready to wear or gift to someone special. If you love these earrings and want to purchase them you can find them both in my Etsy shop and my website as well. I will link them below. Hope you loved this little tutorial I put together for you. Its fun to see a project go from start to finish!

...............................

LINKS TO SHOP THESE PRETTY EARRINGS:

My Etsy Shop:
www.michelleannjewelry.etsy.com

My Website Link:
www.michelleannjewelry.com